# WebMail
# Configurazioni
# Cambiare la lingua
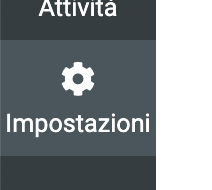
Per cambiare la lingua della [webmail](https://indirizzofacile.it/), cliccare su "Impostazioni"
[](https://help.whiteready.com/uploads/images/gallery/2022-07/xY2j1dA0rV3PP1SV-impostazioni-webmail.png)
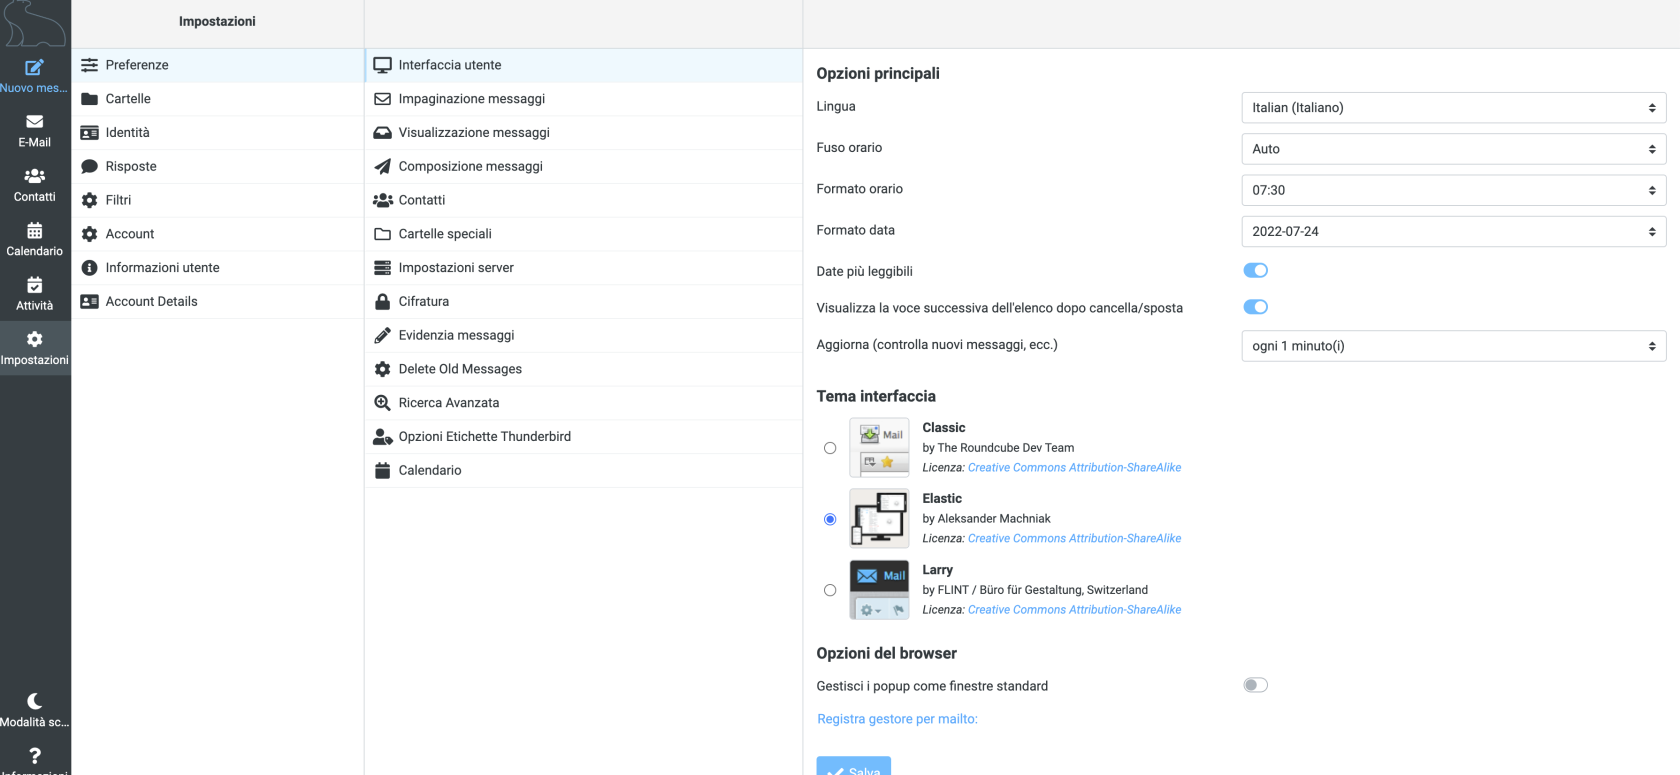
Quindi cliccare su "Preferenze" e quindi su "Interfaccia utente"
In alto a destra selezionare la lingua desiderata
[](https://help.whiteready.com/uploads/images/gallery/2022-07/Oi1W9mzKYbffQDK4-cambio-lingua.png)
Quindi premere "Salva".
# Cambiare le impostazioni grafiche
La webmail viene fornita con alcuni temi:
- Classic
- Elastic
- Larry
Il tema predefinito è "Elastic".
Per cambiare e usare un altro tema è sufficiente cliccare su "**Impostazioni**", quindi su "**Preferenze**", su "**Interfaccia utente**": selezionare il tema di proprio gradimento nella parte più in basso del pannello destro e cliccare "Salva"
[](https://help.whiteready.com/uploads/images/gallery/2022-07/Oi1W9mzKYbffQDK4-cambio-lingua.png)
# Cambiare la password della casella di posta
Quando viene creata una nuova casella di posta (dall'amministratore del dominio) viene anche assegnata una password.
Questa password può essere cambiata dall'utente stesso passando dalla [Webmail](https://help.whiteready.com/books/webmail "WebMail"), usando un semplice procedura.
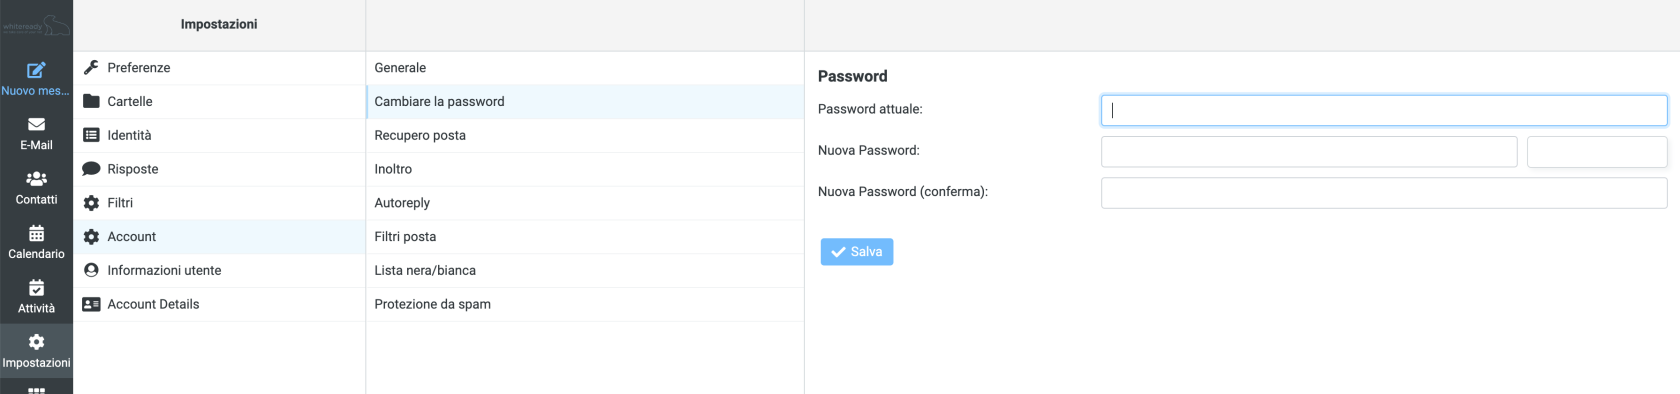
Per cambiare e usare una nuova password è sufficiente cliccare su "**Impostazioni**", quindi su "**Account**", su "**Cambiare password**": inserire la vecchia password nel primo campo, quindi inserire due volta la nuova password (la seconda per conferma) e infine cliccare "**Salva**".
[](https://help.whiteready.com/uploads/images/gallery/2022-08/cambiare-password.png)
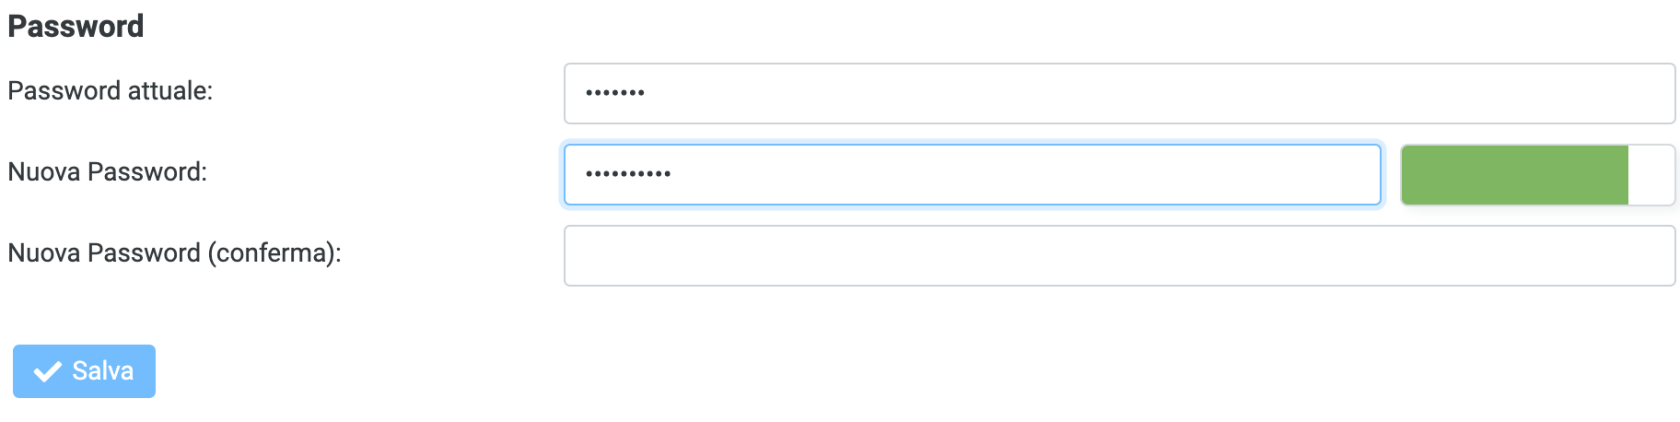
Mentre si digita la nuova password l'area sulla destra si colorerà: il colore indica il livello di complessità e di affidabilità della password che stai digitando.
[](https://help.whiteready.com/uploads/images/gallery/2022-08/robustezza-password.png)
È indispensabile che il colore diventi verde.
Dopo aver salvato, un messaggio apparirà brevemente: se tutto è andato bene, il messaggio è in verde e dice "**Password salvata**", se qualcosa è andato storto il messaggio sarà **in rosso**.
# Set language
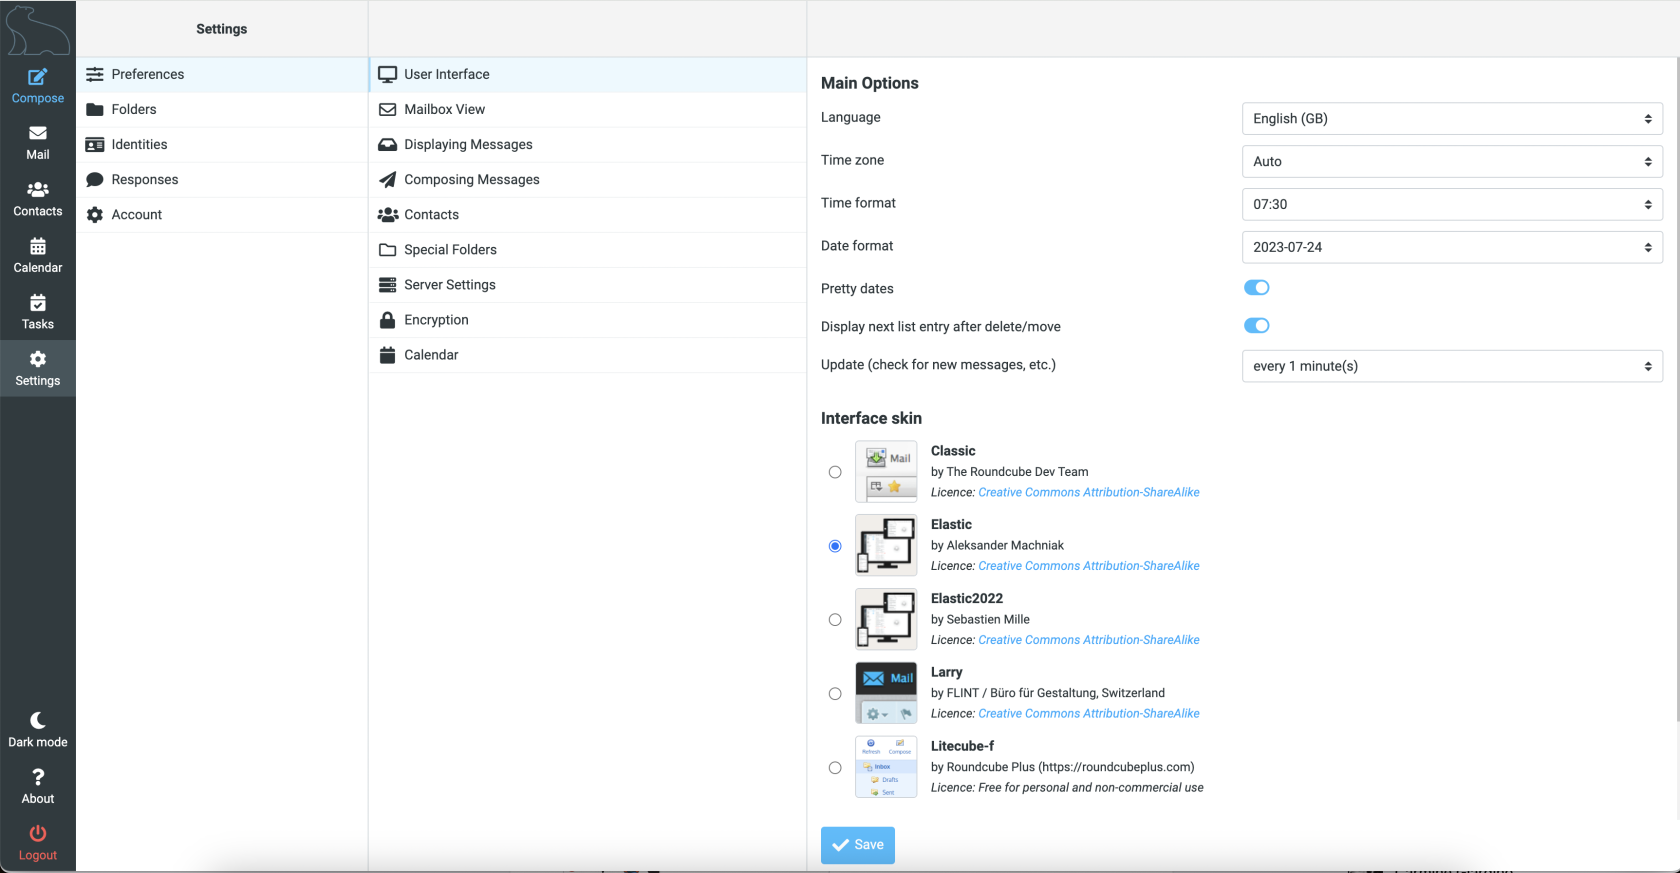
To change the language of the webmail, click on '**Settings**', then on "**Preferences**" and "**User interface**".
On top right corner, select language, then click on "**Save**" button at bottom.
[](https://help.whiteready.com/uploads/images/gallery/2023-12/screenshot-2023-12-30-alle-16-36-07.png)
# How to change language
[Our webmail ](https://www.indirizzofacile.it/)supports many languages.
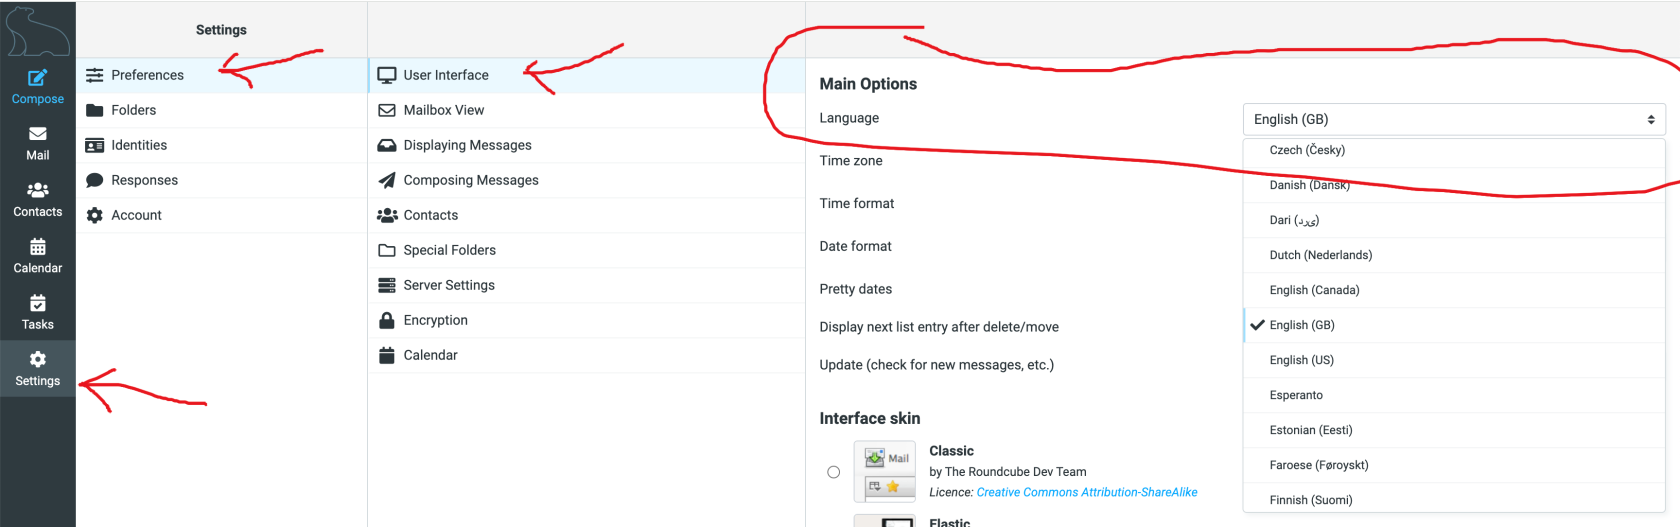
To change the language settings from Italian (default) to other languages, click on the ‘**Settings**’ icon at the bottom left.
Then click on ‘**Preferences**’, then on ‘**User Interface**’: on the page that opens, under ‘**Main Options**’ select your preferred language. Then press the ‘**Save**’ button, at the bottom.
[](https://help.whiteready.com/uploads/images/gallery/2024-10/language.png)
# Change your mailbox password
When a new mailbox is created (by the domain administrator) a password is also assigned.
This password can be changed by the user himself by going through Webmail, using a simple procedure.
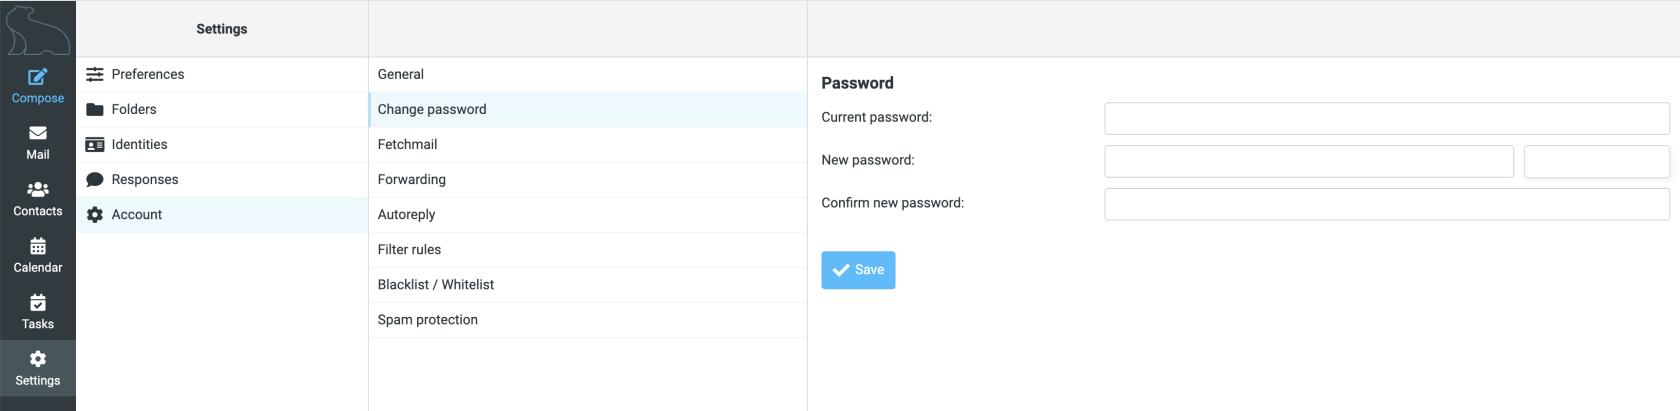
To change and use a new password, simply click on "**Settings**", then on "**Account**", on "**Change password**": enter the old password in the first field, then enter the new password twice (the second time for confirmation) and finally click "**Save**".
[](https://help.whiteready.com/uploads/images/gallery/2025-03/english-pwd.png)
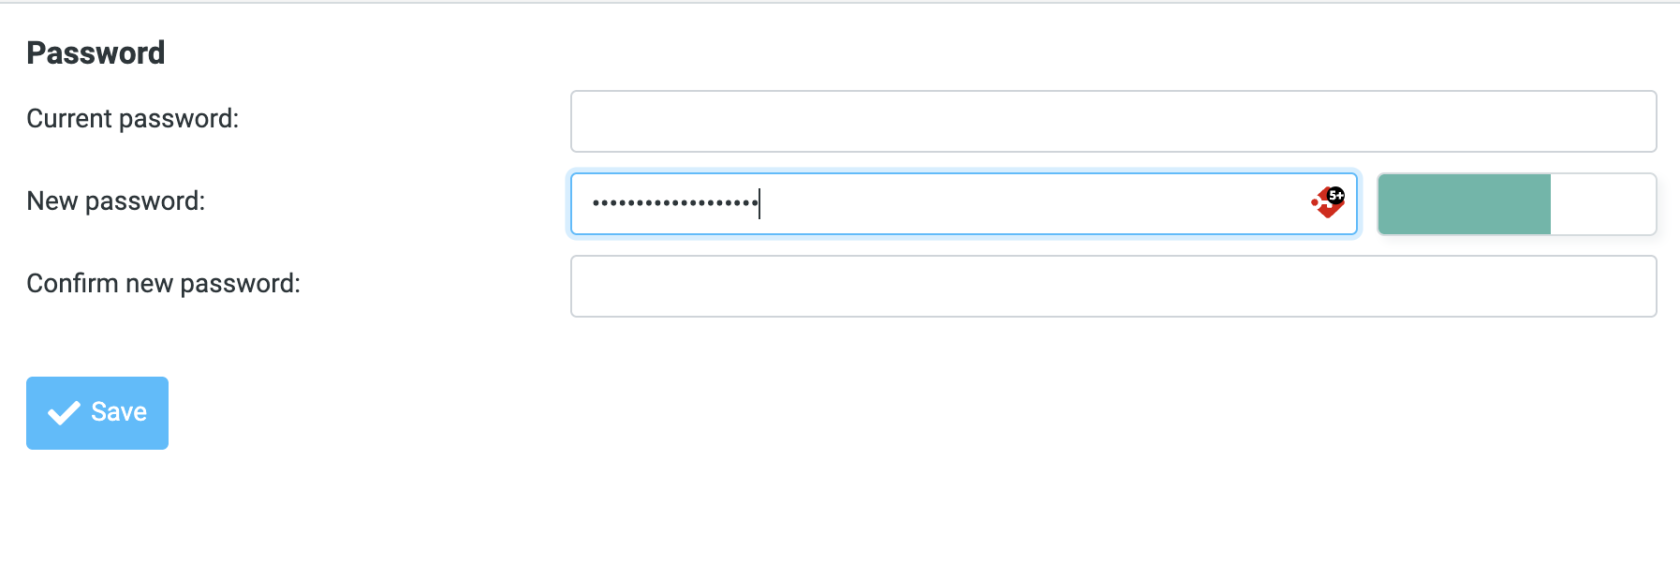
As you type your new password, the area on the right will turn colored: the color indicates the level of complexity and reliability of the password you are typing.
[](https://help.whiteready.com/uploads/images/gallery/2025-03/english-pwd2.png)
It is essential that the color turns **green**.
After saving, a message will appear briefly: if everything went well, the message is in green and says "**Password saved**", if something went wrong the message will be in **red**.
# Firma
Per aggiungere una propria firma alla webmail è necessario entrare su [IndirizzoFacile](https://indirizzofacile.it/) con le proprie credenziali.
Una volta entrati, cliccare su "**Impostazioni**".
[](https://help.whiteready.com/uploads/images/gallery/2022-07/xY2j1dA0rV3PP1SV-impostazioni-webmail.png)
Nella schermata successiva selezionare "**Identità**"
[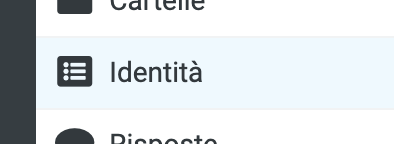](https://help.whiteready.com/uploads/images/gallery/2022-11/identita.png)
e da lì cliccare sulla propria identità
[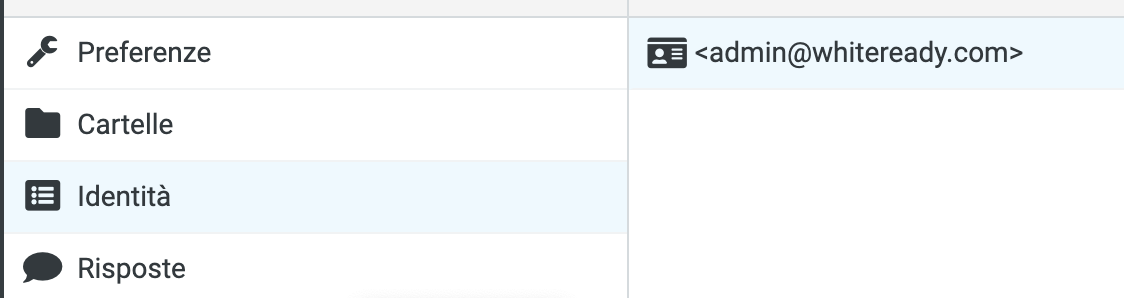](https://help.whiteready.com/uploads/images/gallery/2022-11/identita2.png)
(nel nostro esempio, su )
Si apre una pagina come questa
[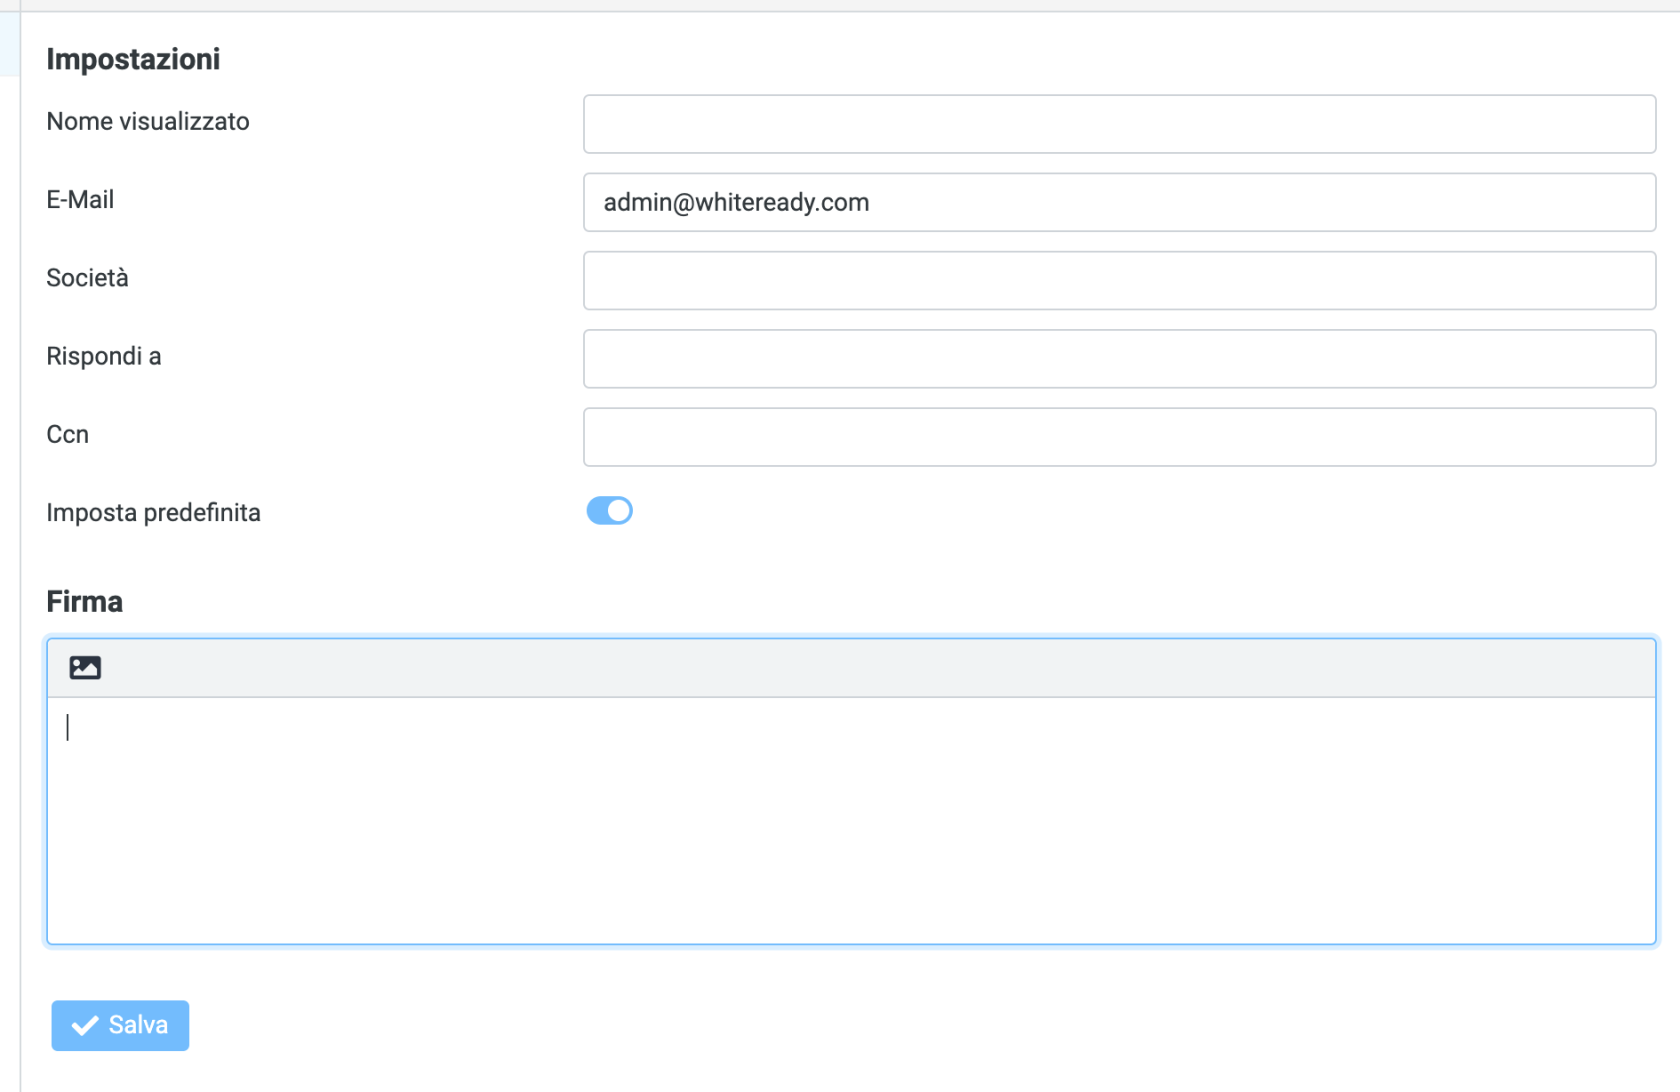](https://help.whiteready.com/uploads/images/gallery/2022-11/firma1.png)
in cui è possibile impostare varie personalizzazioni.
Nel blocco in basso, sotto la voce "**Firma**", è possibile inserire una firma in puro testo (quindi priva di formattazione).
Cliccando però sulla piccola icona sulla sinistra del campo, si attiva la modalità **HTML**.
[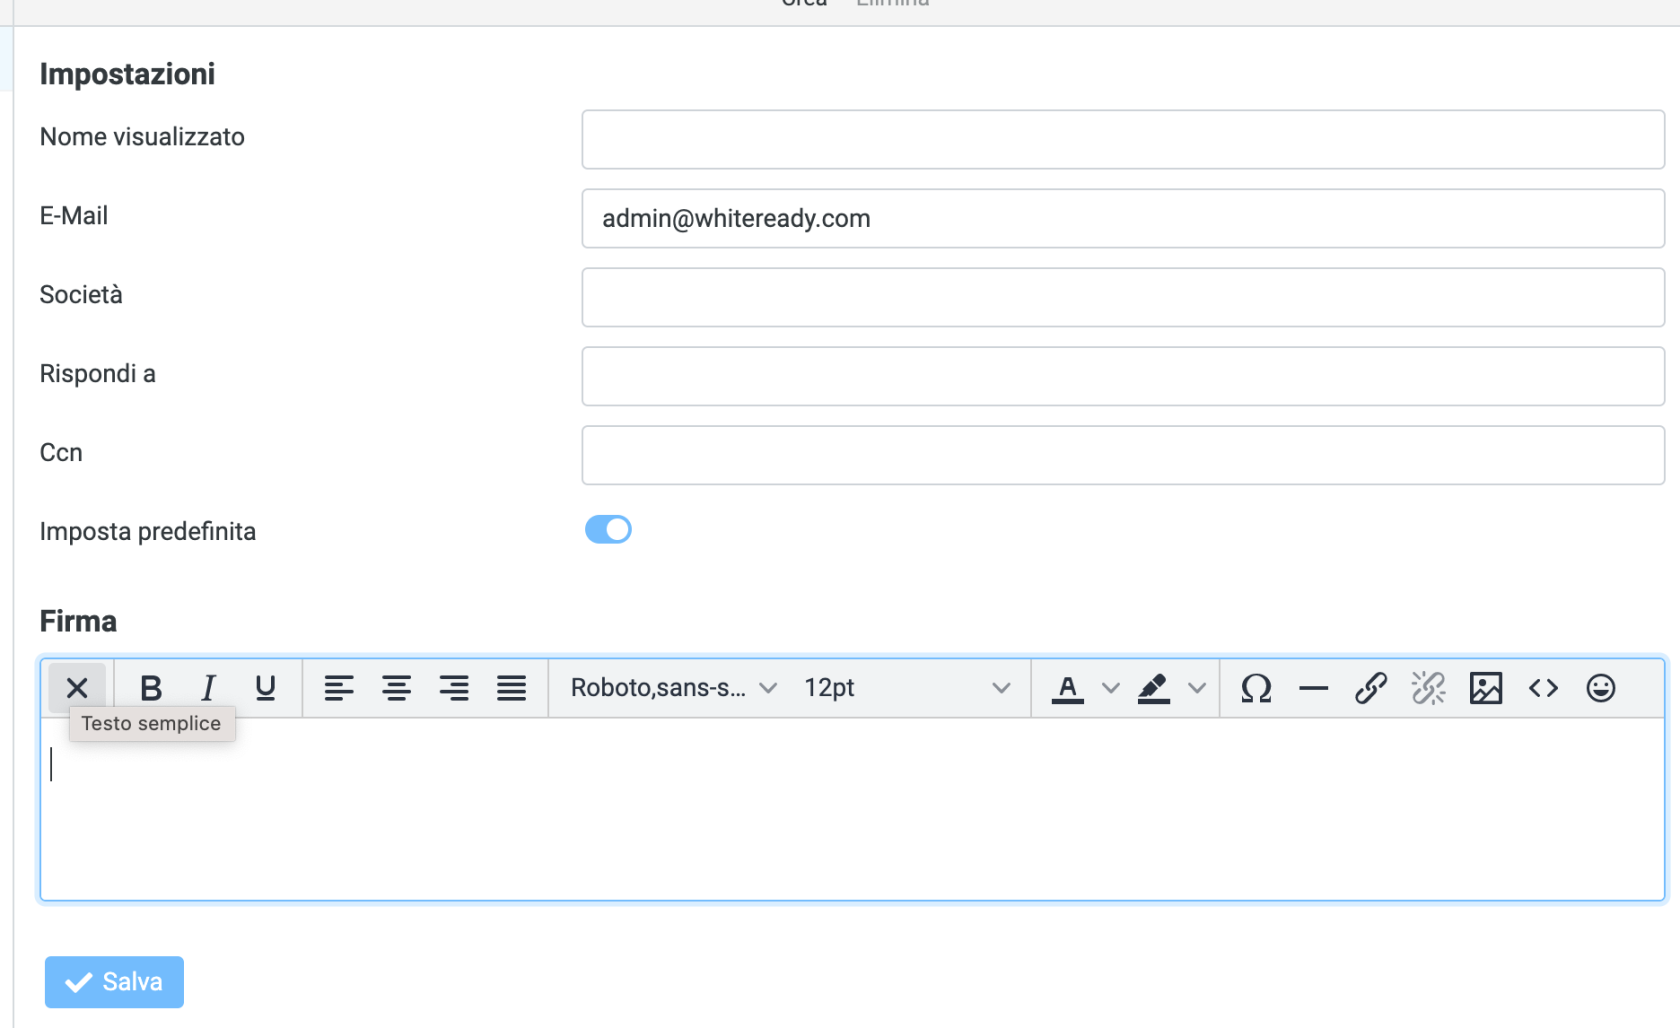](https://help.whiteready.com/uploads/images/gallery/2022-11/firma2.png)
La modalità **HTML** consente di formattare la firma, inserire immagini, scegliere il carattere, etc.
Una volta finito, premere il tasto "**Salva**" e inviarsi una mail per vedere il risultato.
È bene tenere conto di alcune cose:
- Non esagerare con la firma: non inserire troppi link, troppe immagini, troppi colori: i filtri antispam penalizzano fortemente questo tipo di formattazione
- Non scrivere il testo TUTTO MAIUSCOLO: anche questa abitudine viene "punita" dai filtri antispam.
- La visualizzazione finale dipende in gran parte dal programma di posta usato da chi poi la mail la dovrà leggere: fate delle prove per trovare un compromesso soddisfacente fra le necessità grafiche e la scalabilità della vostra firma.
- In ogni caso, fate riferimento a questo **[articolo](https://help.whiteready.com/books/posta/page/la-mia-posta-va-a-finire-nello-spam-dei-destinatari "La mia posta va a finire nello spam dei destinatari")** (è importante).
# Come importare la rubrica sulla Webmail
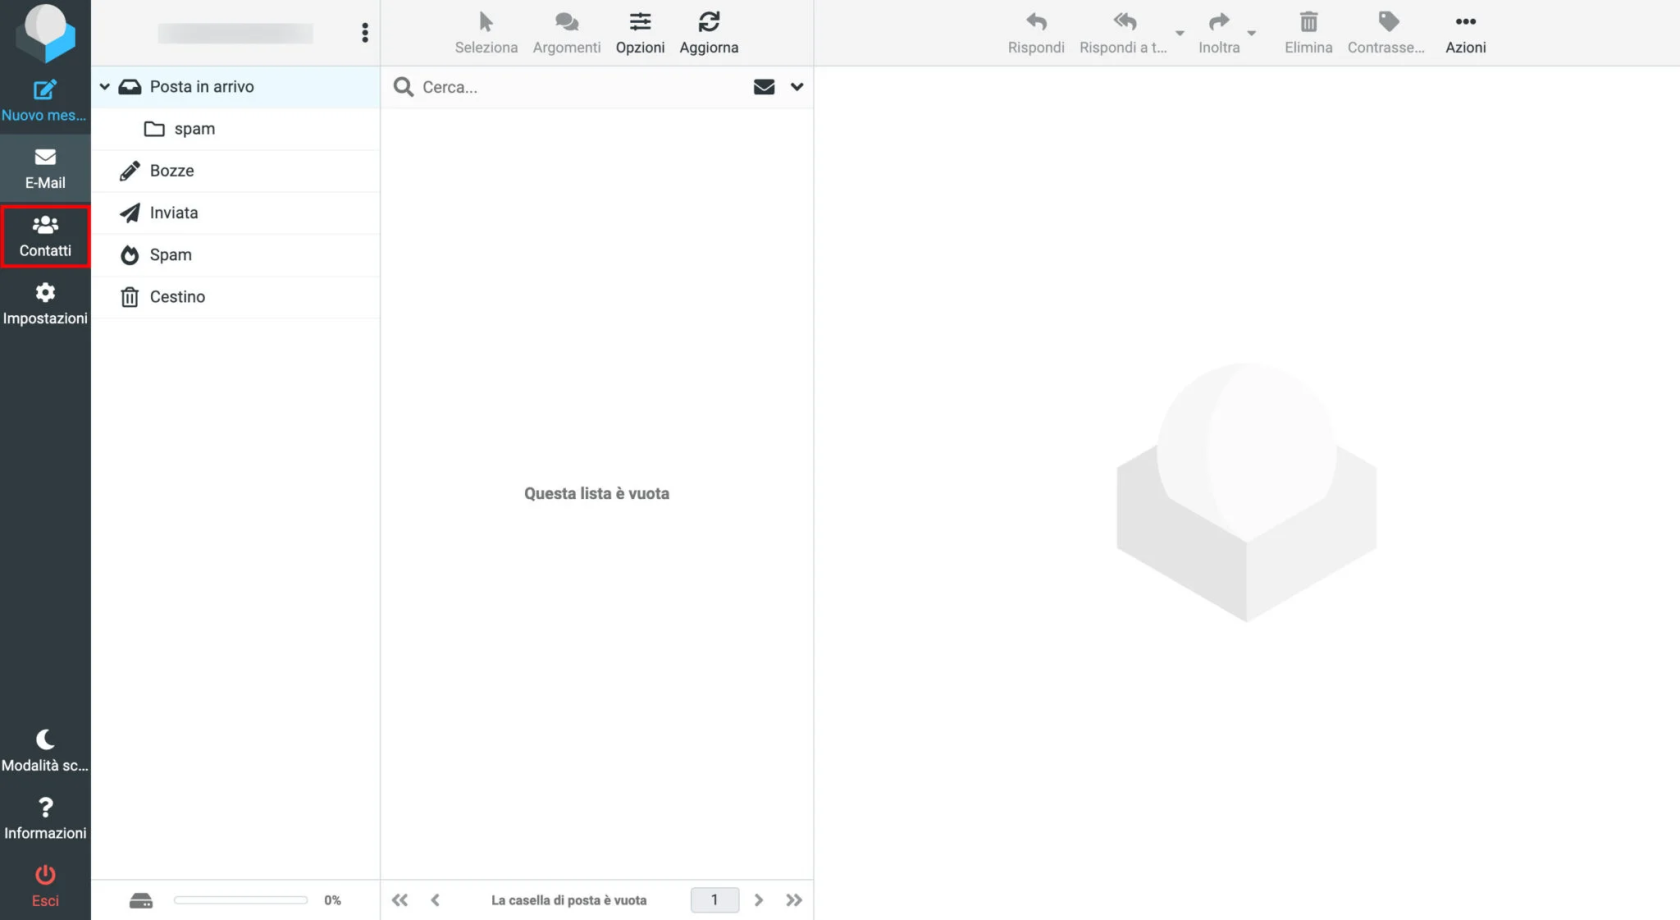
Dopo aver effettuato l’accesso alla webmail cliccare su **Contatti** nel menu di lato a sinistra.
[](https://help.whiteready.com/uploads/images/gallery/2022-12/image.png)
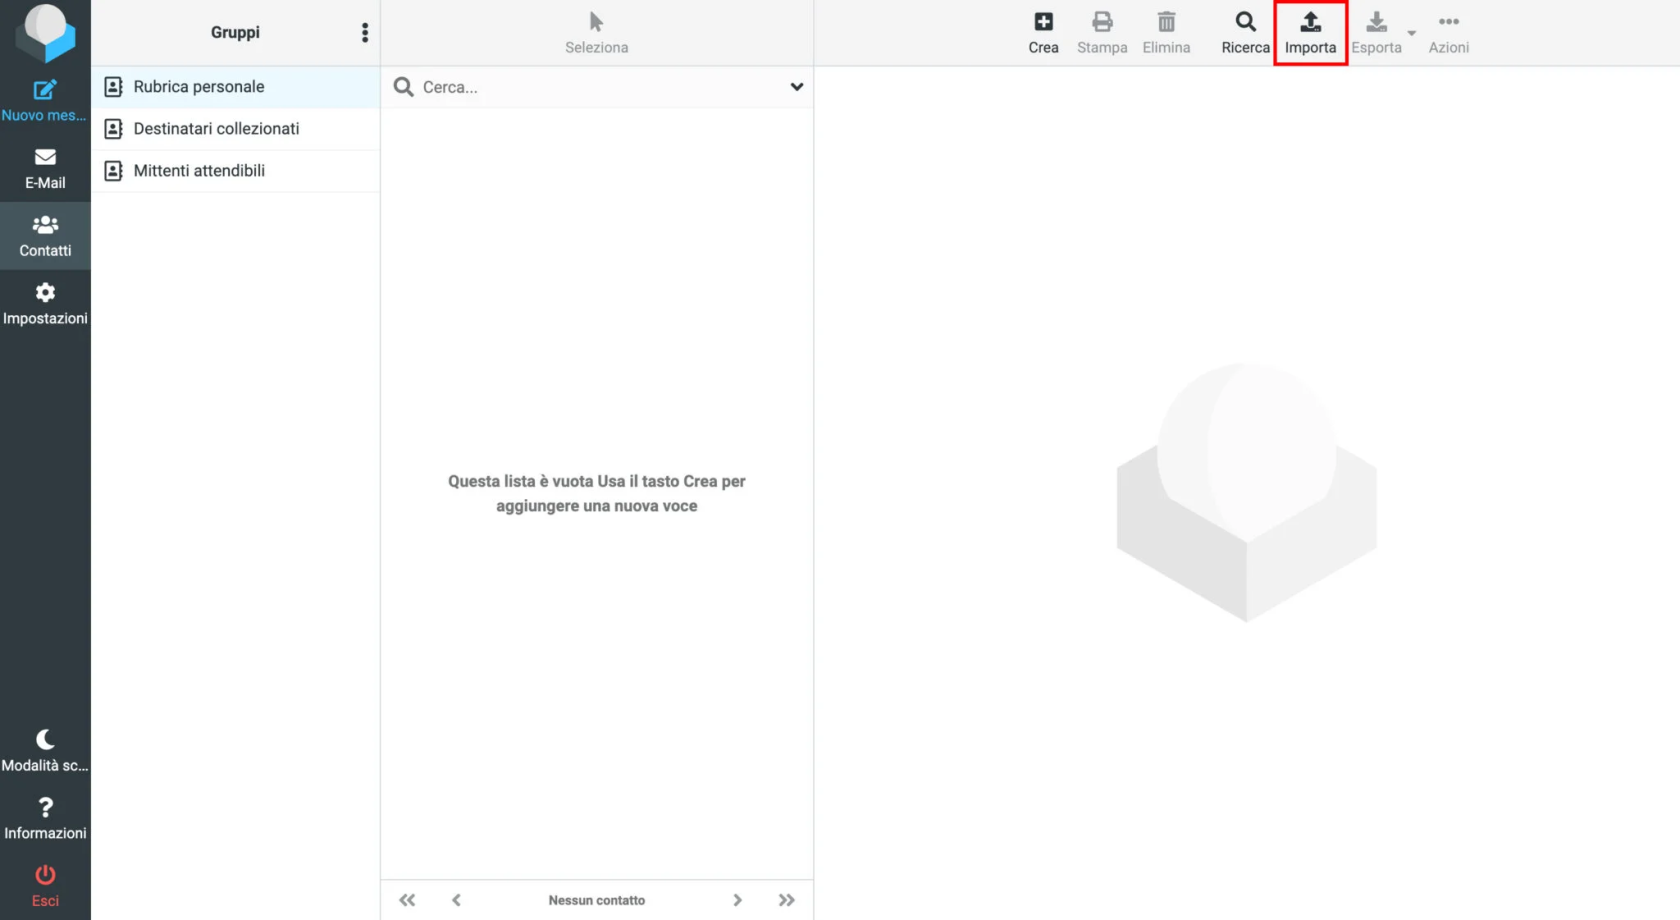
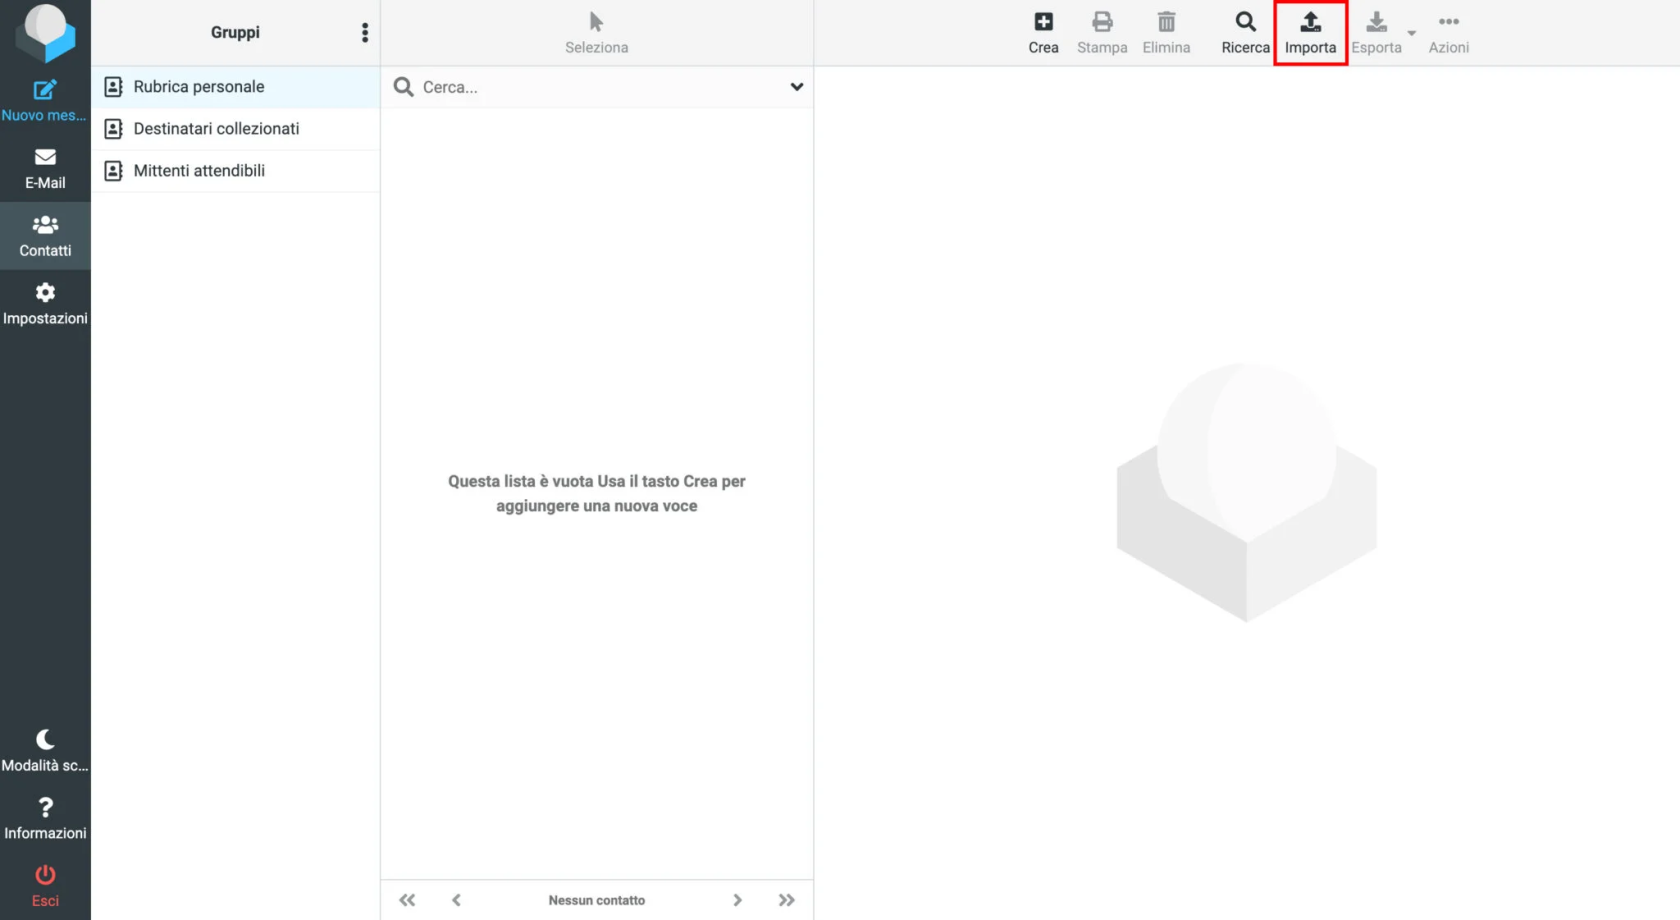
Nella schermata successiva cliccare su **Importa** nel menu in alto a destra.
[](https://help.whiteready.com/uploads/images/gallery/2022-12/Dqsimage.png)
[](https://help.whiteready.com/uploads/images/gallery/2022-12/2Ejimage.png)
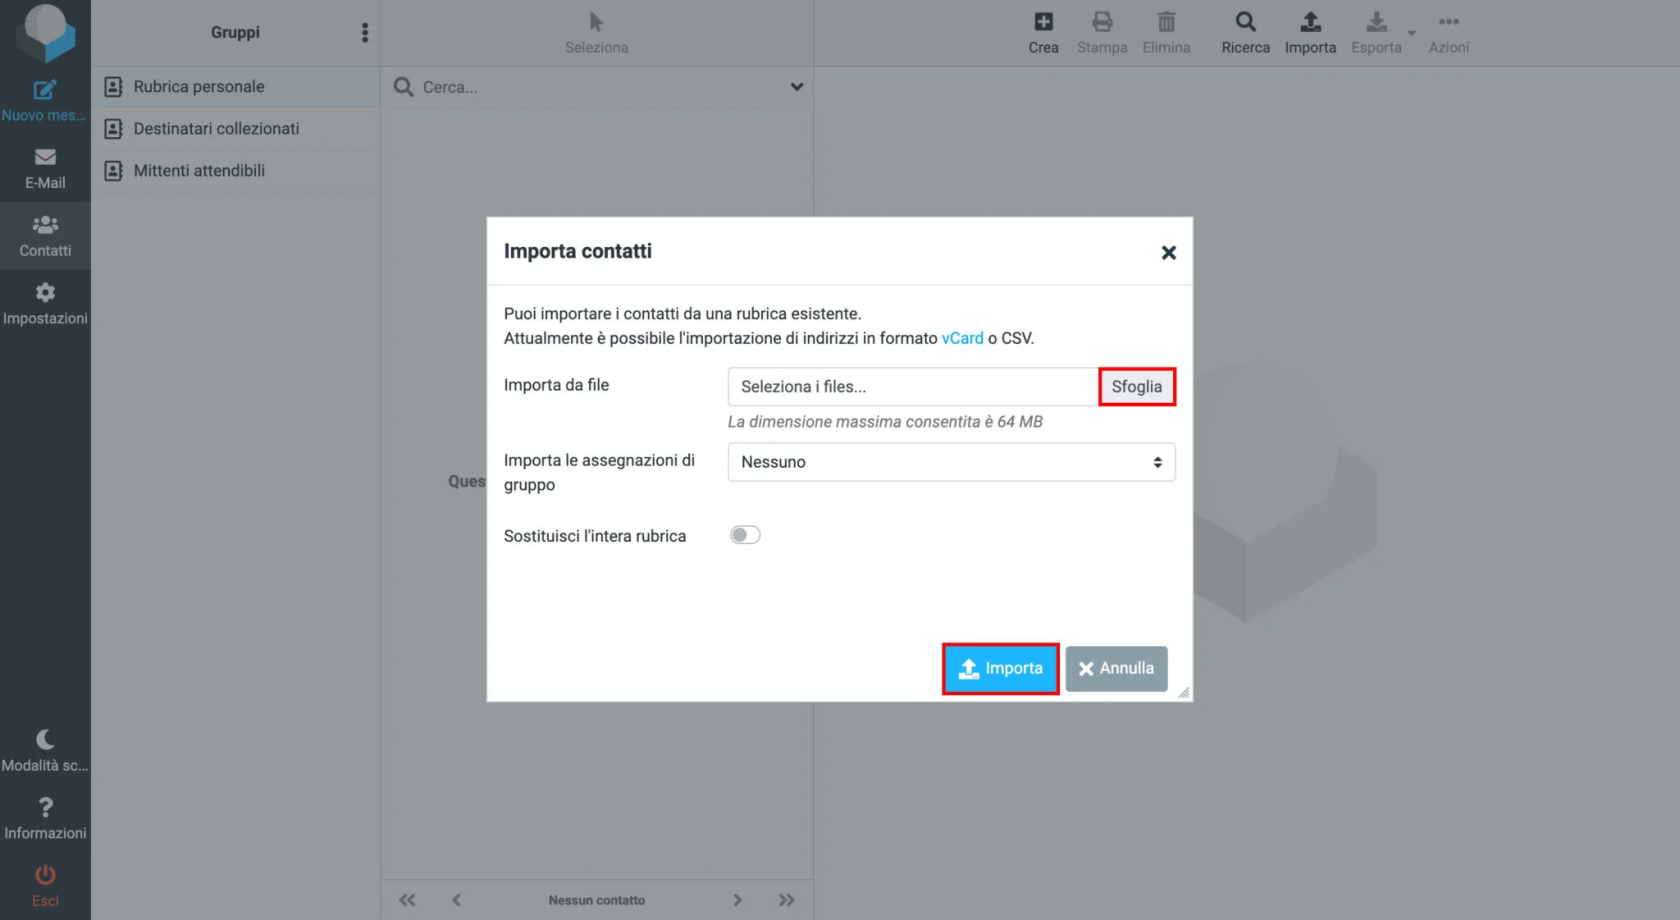
Nella finestra pop-up che comparirà cliccare su **Sfoglia** e poi, dopo aver selezionato il file con estensione .csv da importare, cliccare su **Importa**.
[](https://help.whiteready.com/uploads/images/gallery/2022-12/ngKimage.png)
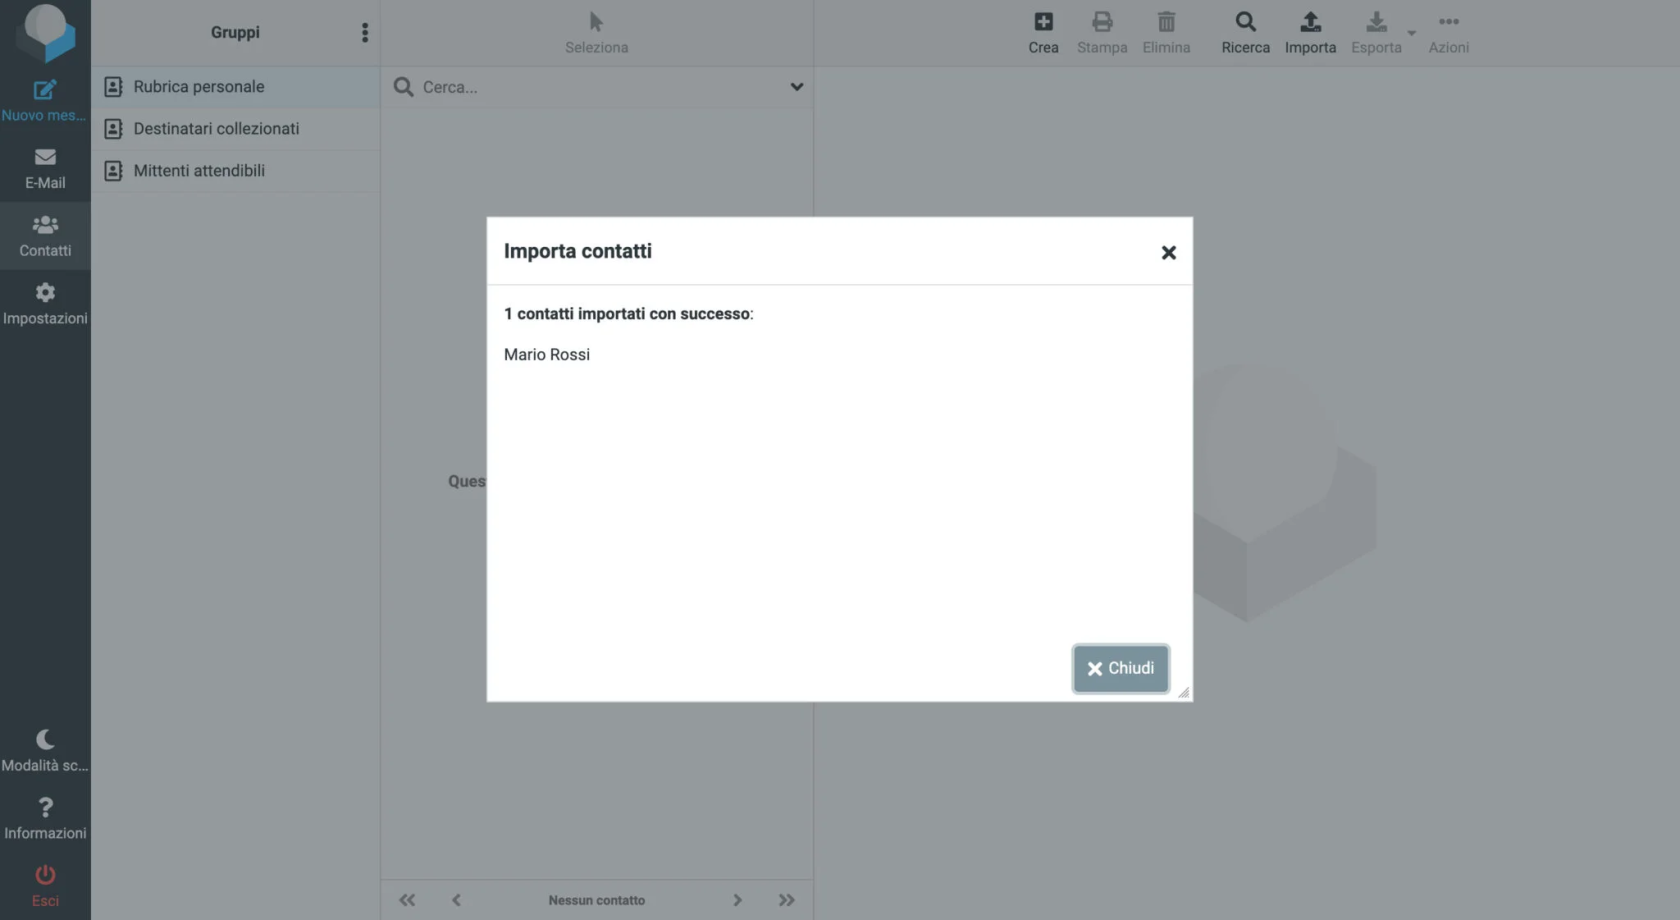
Una volta completata l’operazione la rubrica sarà stata importata.
[](https://help.whiteready.com/uploads/images/gallery/2022-12/iW4image.png)
# Come esportare la rubrica sulla Webmail
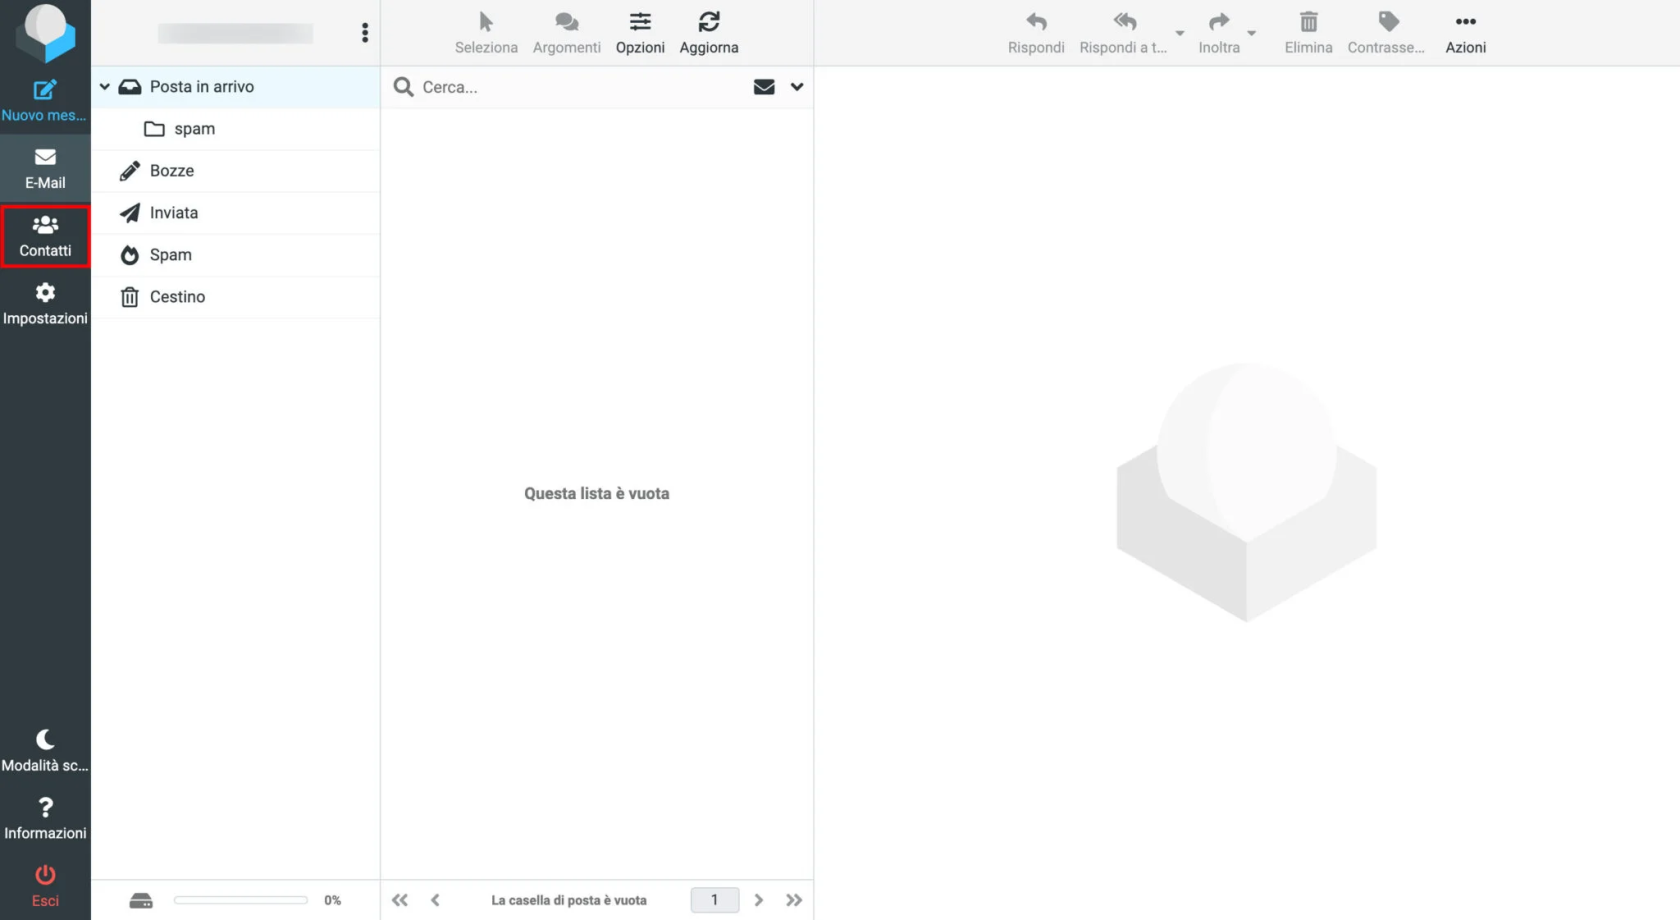
Dopo aver effettuato l’accesso alla webmail cliccare su **Contatti** nel menu di lato a sinistra.
[](https://help.whiteready.com/uploads/images/gallery/2022-12/BMIimage.png)
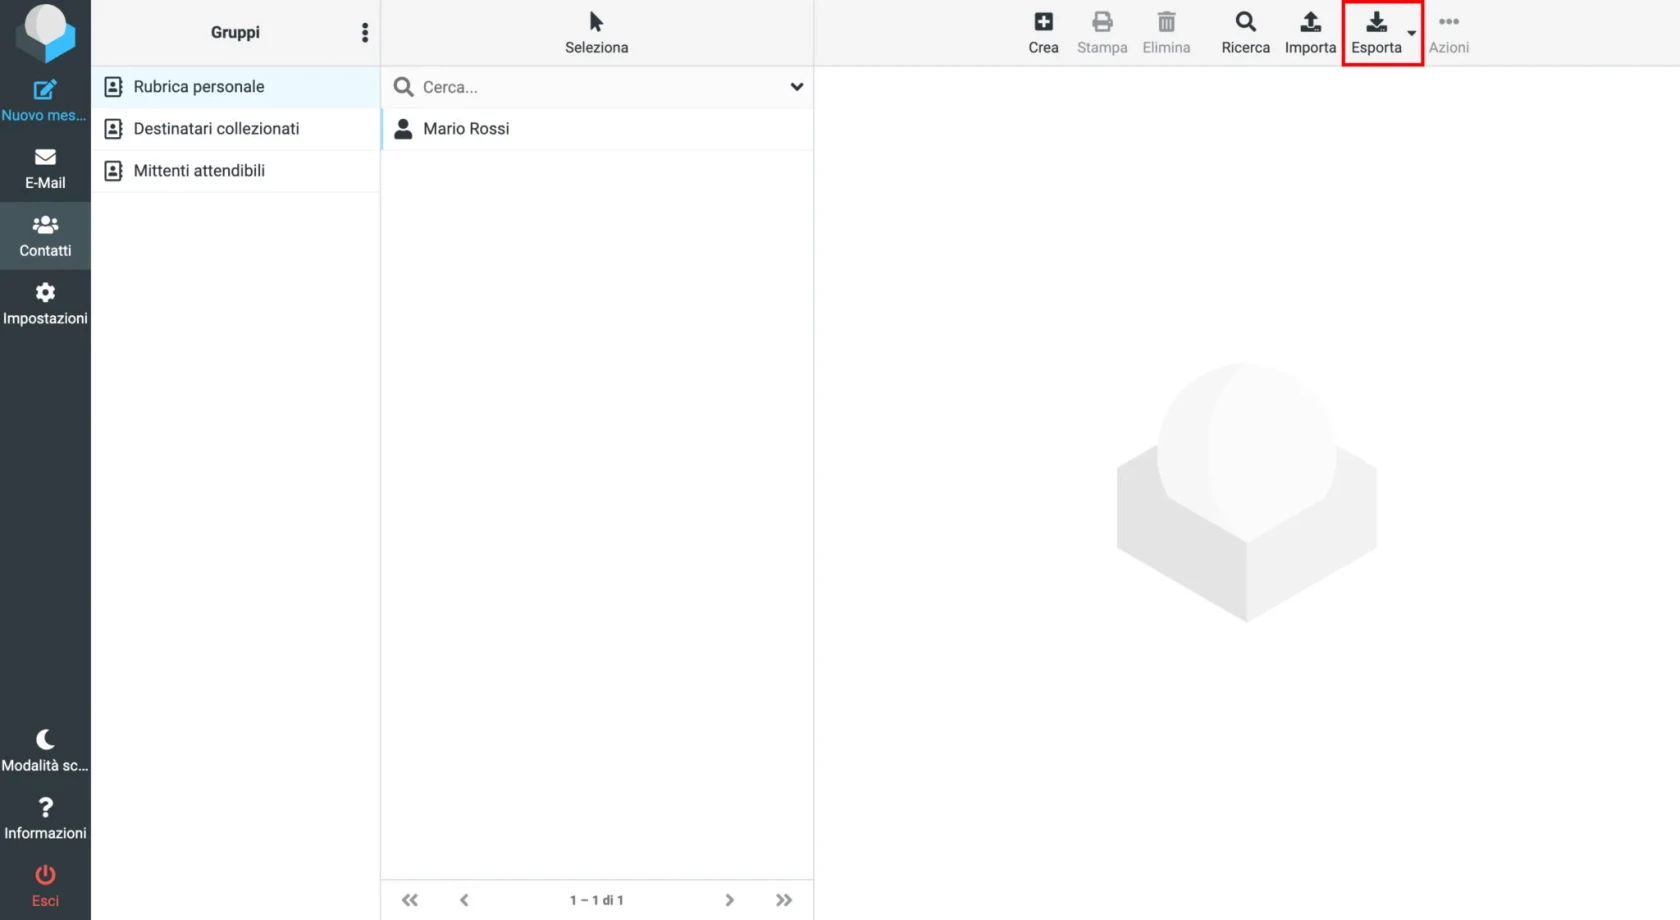
Nella schermata successiva cliccare su **Esporta** nel menu in alto a destra.
[](https://help.whiteready.com/uploads/images/gallery/2022-12/rubrica-roundcube-2-2048x1121.jpg)
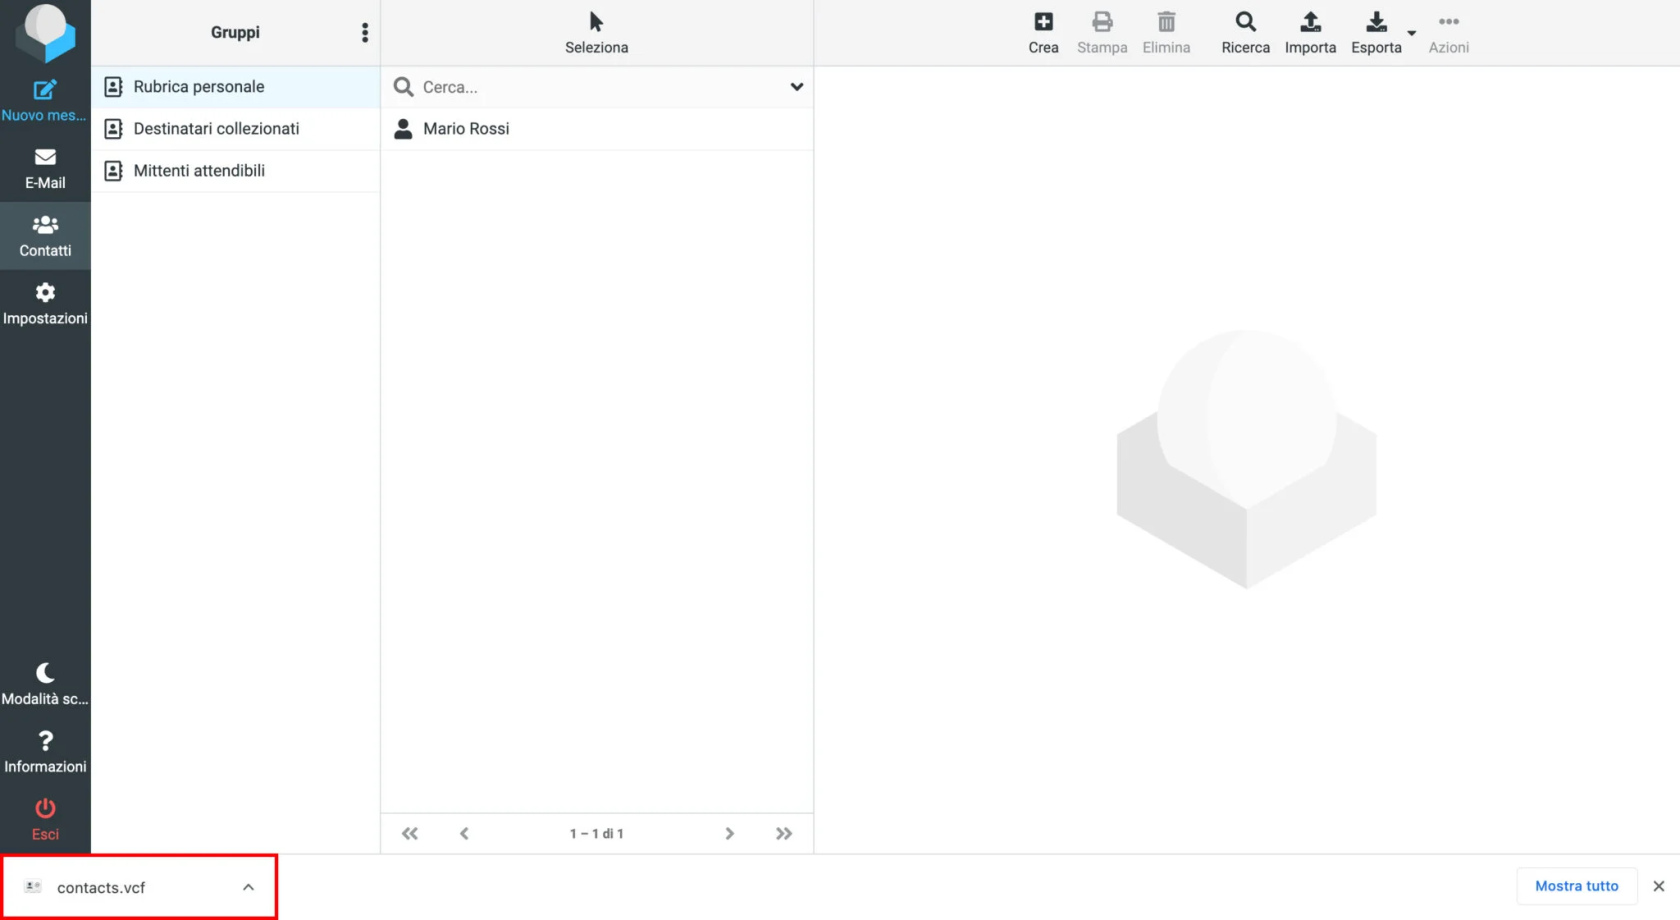
A questo punto partirà il download del file **contacts.csv** contenente l’intera rubrica.
[](https://help.whiteready.com/uploads/images/gallery/2022-12/zDdimage.png)
# Come impostare "Out of office"
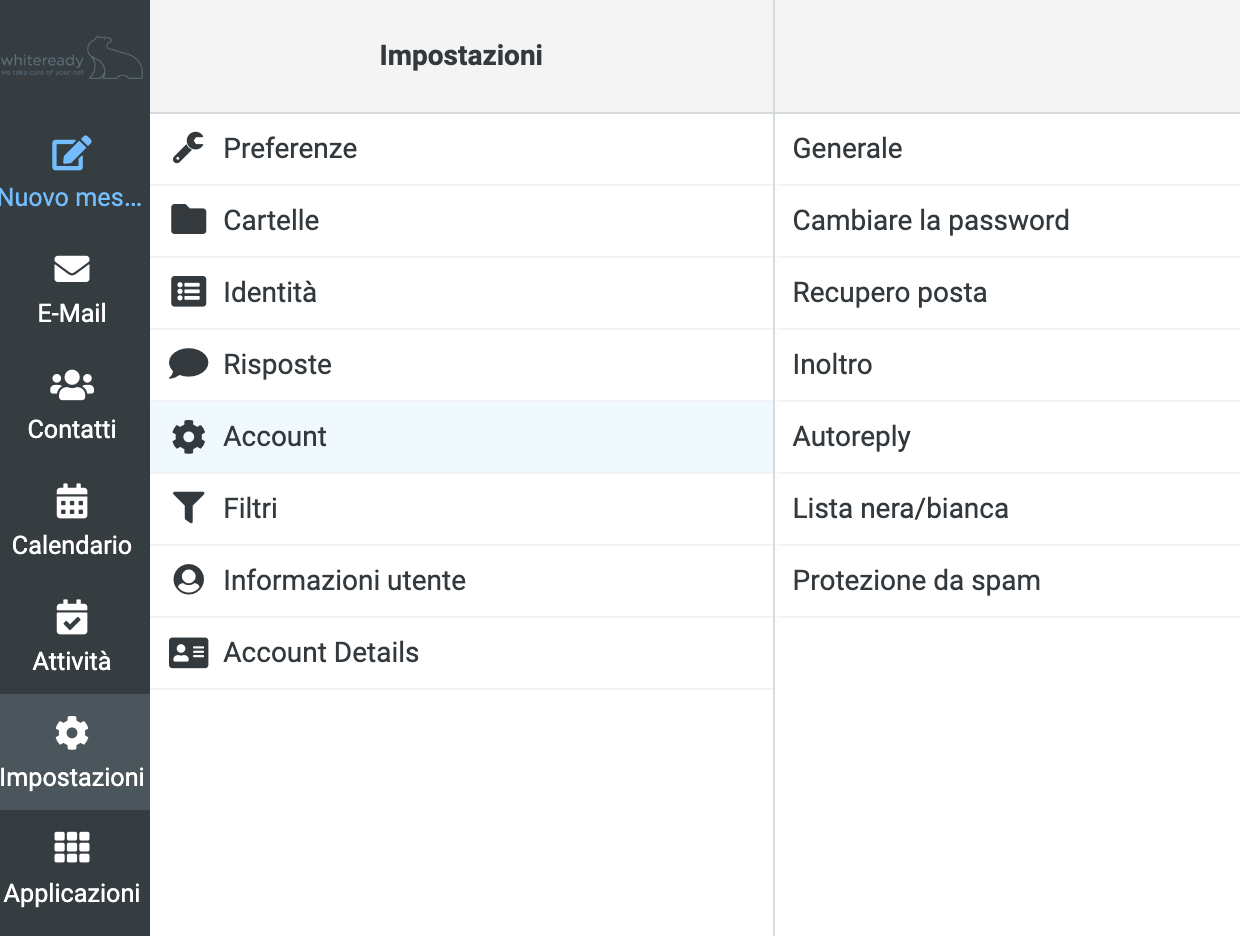
Dalla [webmail](https://indirizzofacile.it), andare su "**Impostazioni**", quindi su "**Account**" e poi su "**Autoreply**"
[](https://help.whiteready.com/uploads/images/gallery/2023-03/screenshot-2023-03-21-alle-19-43-53.png)
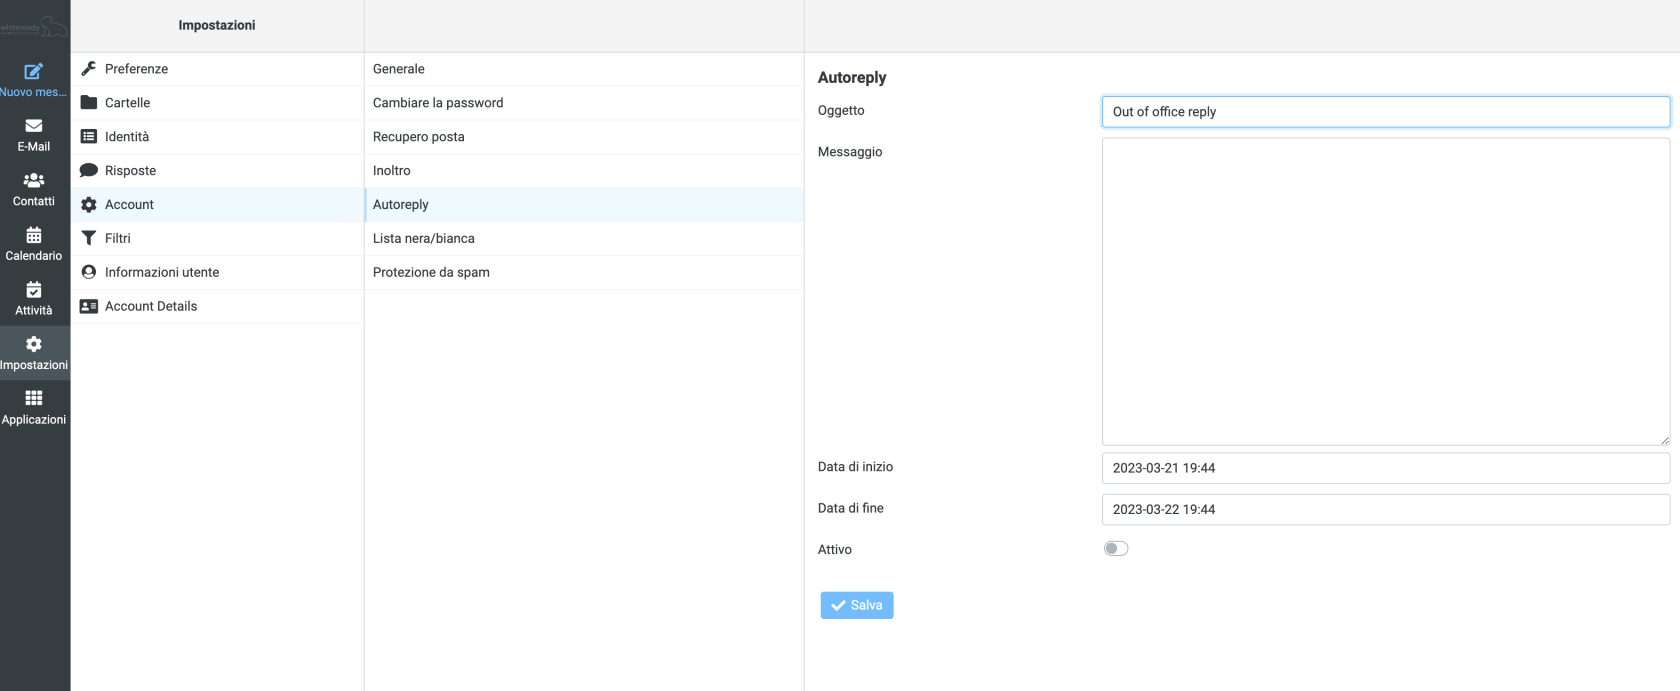
Nella parte destra della pagina, compilare il form
[](https://help.whiteready.com/uploads/images/gallery/2023-03/screenshot-2023-03-21-alle-19-44-11.png)
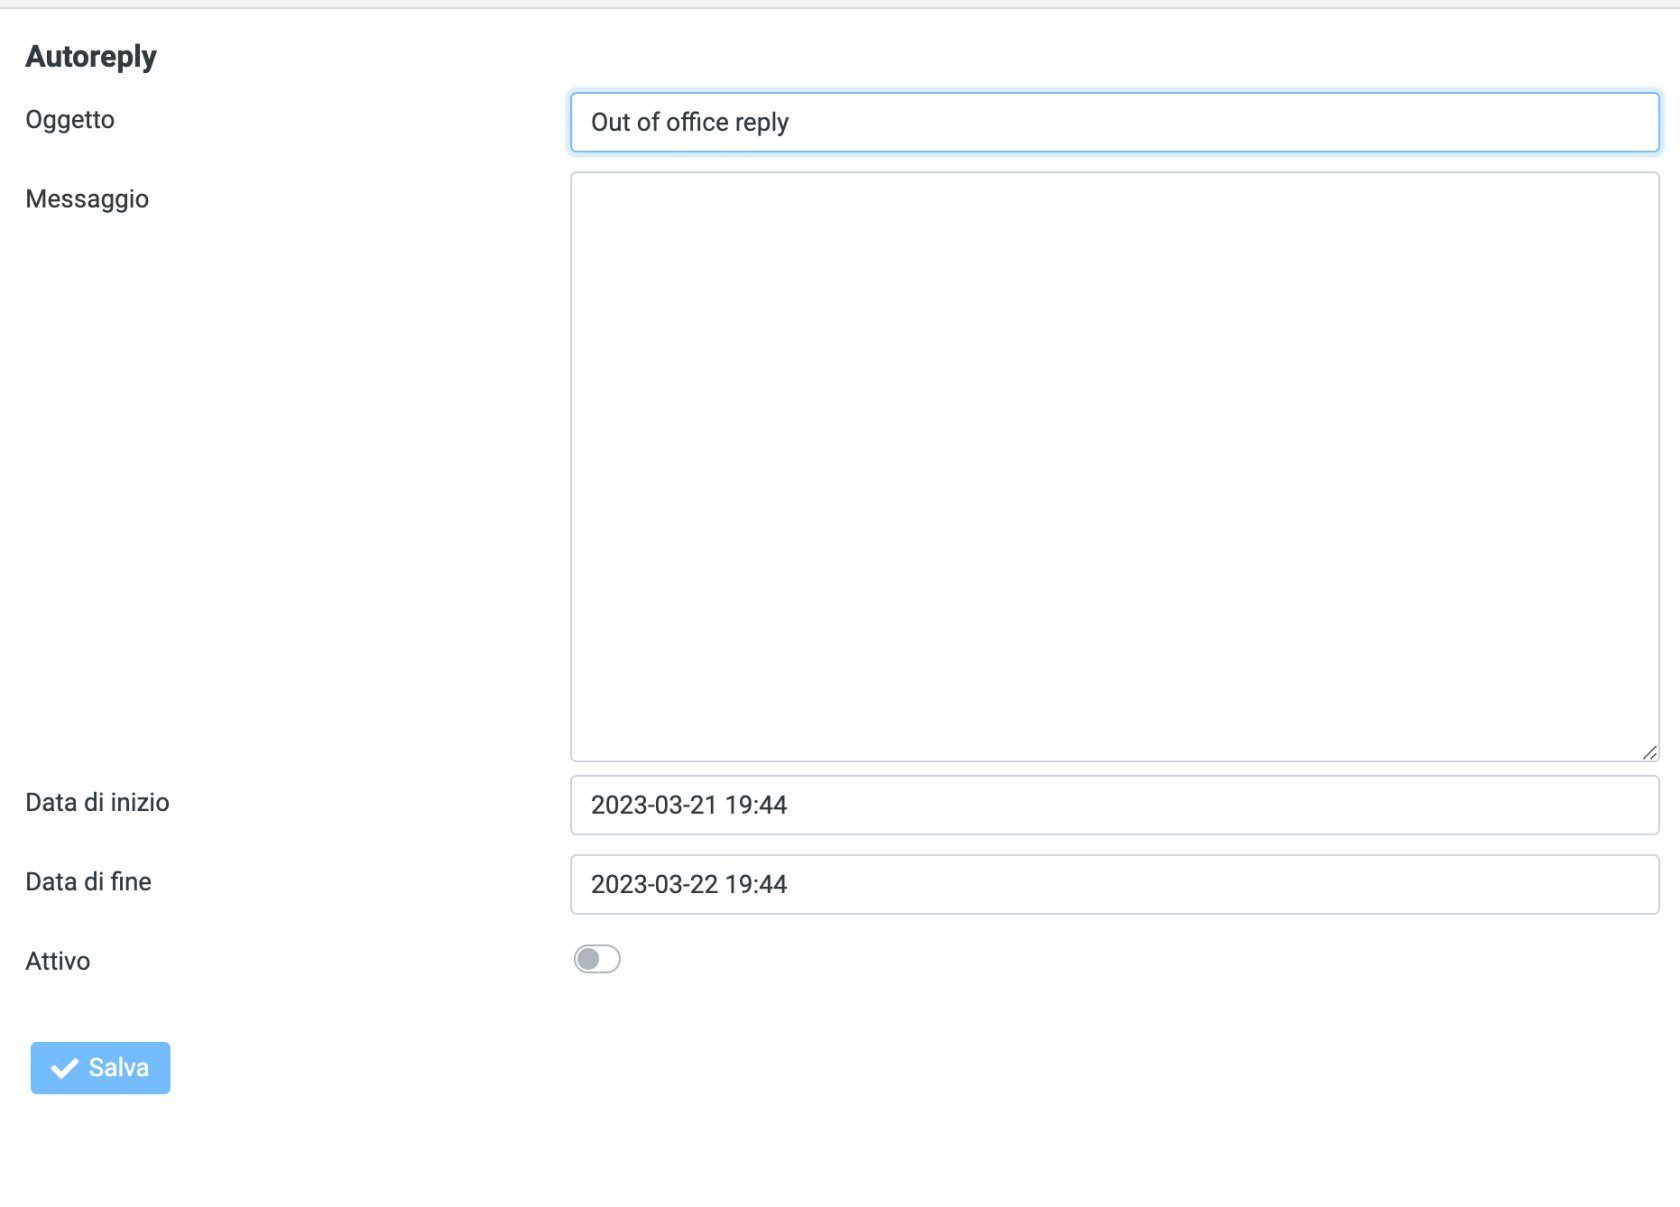
Impostare l'**oggetto**, il **messaggio automatico**, la **data di inizio** e la **data di fine**.
[](https://help.whiteready.com/uploads/images/gallery/2023-03/screenshot-2023-03-21-alle-19-46-33.png)
Quindi selezionare "**Attivo**" e premere "**Salva**".
# How to change password
When a new mailbox is created (by the domain administrator), a password is also assigned.
This password can be changed by the user himself via [Webmail](https://www.indirizzofacile.it/), using a simple procedure.
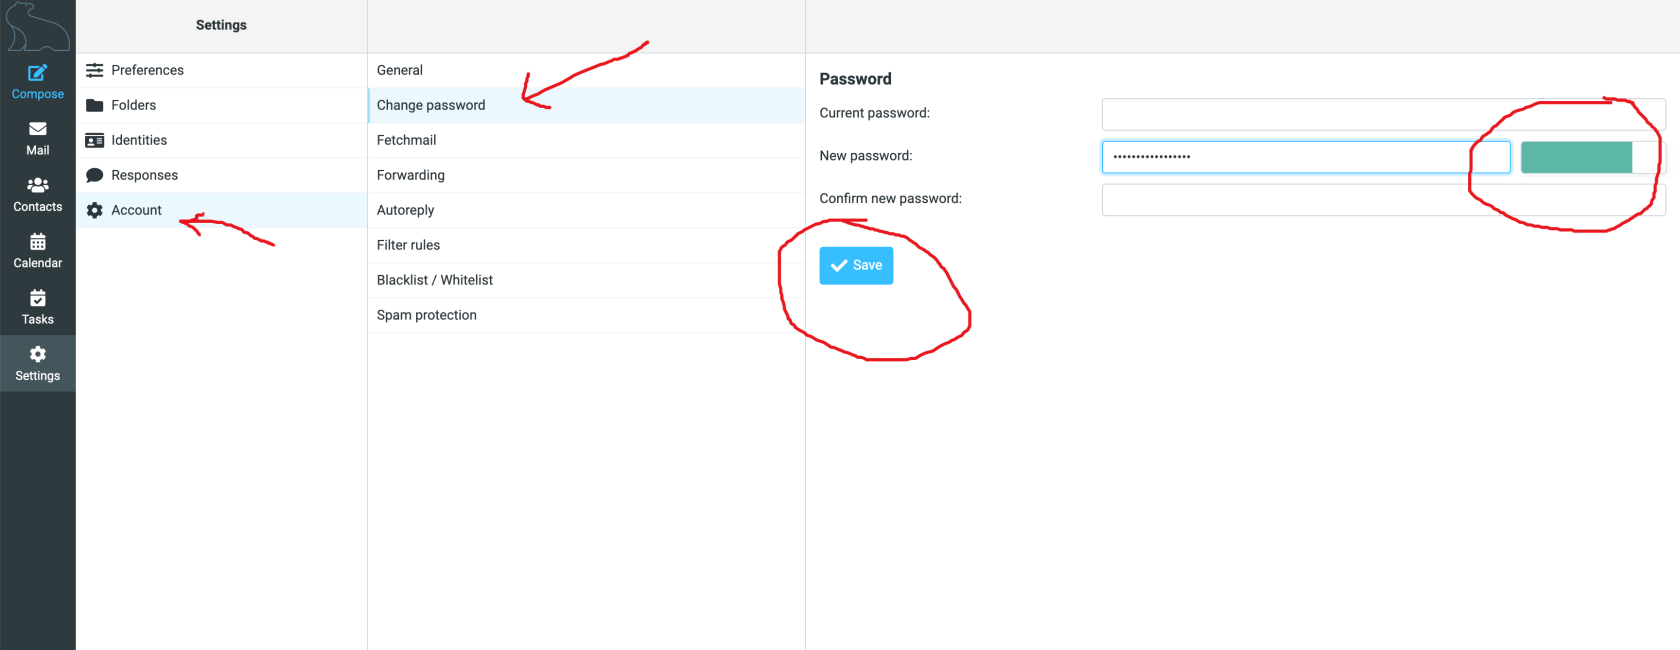
To change and use a new password, simply click on ‘**Settings**’, then on ‘**Account**’, on ‘**Change Password**’: enter the old password in the first field, then enter the new password twice (the second time for confirmation) and finally click ‘**Save**’.
[](https://help.whiteready.com/uploads/images/gallery/2024-10/pwd.png)
As you type in your new password, the area on the right will be coloured: the colour indicates the level of complexity and reliability of the password you are typing in.
It is imperative that the colour turns **green**.
After saving, a message will briefly appear: if everything went well, the message is in green and says ‘**Password saved**’, if something went wrong, the message will be in **red**.